Run a Chaos Experiment
This document describes how to create, run, view, pause, update, and delete Chaos experiments in Chaos Mesh.
Create Chaos experiments
You can create the following types of Chaos experiments in Chaos Mesh:
- One-time Chaos experiments: The smallest instance of Chaos experiments. Once a one-time experiment is created, Chaos Mesh immediately injects faults into the target test machine according to the experiment configurations. If the
durationparameter is configured, injected faults will be restored automatically after a period of time specified byduration. When the Chaos experiment is paused or deleted, injected faults will be restored immediately. - Scheduled or cyclic Chaos experiments: Chaos experiments that can be run at a regular interval or cyclically. You need to define the scheduling rules for the experiment when creating this type of Chaos experiment.
One-time Chaos experiments
To create a one-time Chaos experiment, you can use one of the following methods:
- Use Chaos Dashboard to create a new Chaos experiment, then click Submit to run the experiment. For more details, refer to the documentation of each specific Chaos experiment type.
- Use a YAML file to define the Chaos experiment, then create and run the experiment using
kubectl. If you want to create and run a Chaos experiment in this way, take the following steps:
-
Create a new YAML file to define a Chaos experiment. Add configuration parameters in the file based on the type of Chaos experiment you want to create.
Take a NetworkChaos experiment as an example. Save the following YAML text as
network-delay.yaml.apiVersion: chaos-mesh.org/v1alpha1
kind: NetworkChaos
metadata:
name: network-delay
spec:
action: delay # the specific chaos action to inject
mode: one # the mode to run chaos action; supported modes are one/all/fixed/fixed-percent/random-max-percent
selector: # pods where to inject chaos actions
namespaces:
- default
labelSelectors:
'app': 'web-show' # the label of the pod for chaos injection
delay:
latency: '10ms'
duration: '12s'The above YAML example defines a network latency fault lasting for
12 seconds, targeting applications with the"app": "web-show"tag under thedefaultnamespace. For more configuration information about the NetworkChaos experiment, refer to Simulate network chaos. -
Execute the following command to create and run this Chaos experiment.
kubectl apply -f network-delay.yaml -
To view the running status of the Chaos experiment after it begins, use the following
kubectl describecommand to check thestatusoreventof this experiment object.kubectl describe networkchaos network-delayFor detailed steps to check the result of the Chaos experiment, refer to Inspect Chaos experiments.
Scheduled or cyclic Chaos experiments
Chaos Mesh offers the Schedule object to create scheduled Chaos experiments and cyclic Chaos experiments.
To create this type of Chaos experiments, take the following steps:
-
Create a new YAML file to define a Chaos experiment. You need to configure the
Scheduleparameter in the YAML file to define specific schedule rules for the experiment, and then configure other parameters according to the type of Chaos experiments you want to create.Take a scheduled NetworkChaos experiment as an example. Save the following YAML text as
schedule-delay-example.yaml.apiVersion: chaos-mesh.org/v1alpha1
kind: Schedule
metadata:
name: schedule-delay-example
spec:
schedule: '5 * * * *'
historyLimit: 2
concurrencyPolicy: 'Allow'
type: 'NetworkChaos'
networkChaos:
action: delay
mode: one
selector:
namespaces:
- default
labelSelectors:
'app': 'web-show'
delay:
latency: '10ms'
duration: '12s'The above YAML example defines a network latency fault that can be automatically triggered at the fifth minute of each hour.For detailed introduction of scheduling rules, refer to Define scheduling rules.
noteIf you do not set the
durationparameter, the fault behavior keeps taking effect until you pause or delete the Chaos experiment. -
Execute the following command to create and run this Chaos experiment.
kubectl apply -f schedule-delay-example.yaml -
To view the running status of the Chaos experiment after it begins, use the following
kubectl describecommand to check thestatusoreventof this experiment object.kubectl describe networkchaos schedule-delay-exampleFor detailed steps to check the result of the Chaos experiment, refer to Inspect Chaos experiments.
Pause Chaos experiments
Pause or resume Chaos experiments using commands
For a running Chaos experiment, you can pause the experiment by setting a pause annotation to it using commands.
For example, you can use the following command to pause a Chaos experiment named network-delay in the default namespace:
kubectl annotate networkchaos network-delay experiment.chaos-mesh.org/pause=true
After this command is executed, Chaos Mesh restores the injected faults immediately. If you want to resume this Chaos experiment from the pause state to the normal running state, use the following command:
kubectl annotate networkchaos network-delay experiment.chaos-mesh.org/pause-
Pause or resume Chaos experiments using Chaos Dashboard
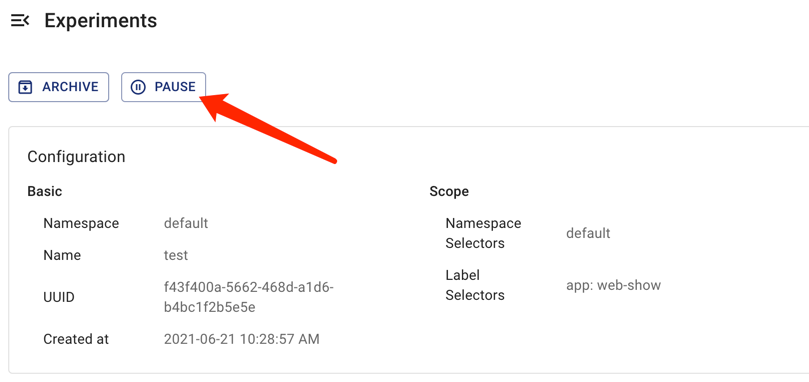
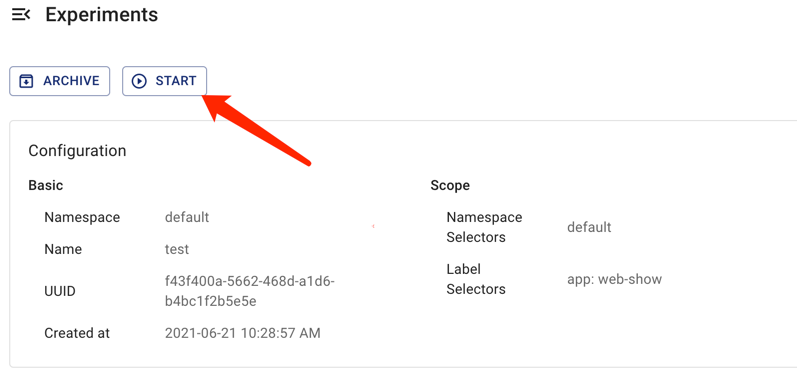
If you want to pause or resume a Chaos experiment using Chaos Dashboard, find the Chaos experiment you want on the Dashboard and click the Pause button or the Start button.


Update Chaos experiments
Update Chaos experiments using commands
The Spec field of Chaos experiment is currently not allowed to be updated.
For more details, refer to the related GitHub issue.
Update Chaos experiments using Chaos Dashboard
The Chaos Dashboard doesn't support updating Chaos experiments at this time because the Spec field of Chaos experiments is not allowed to be updated.
Delete Chaos experiments
Delete Chaos experiments using commands
After a Chaos experiment finishes, you can delete the experiment using the following kubectl delete command. Once you delete the Chaos experiment, the injected fault will be restored immediately:
kubectl delete -f network-delay.yaml
# or delete the chaos object directly
kubectl delete networkchaos network-delay
If the delete operation is blocked, this means that some fault behaviors of the target object cannot be restored. You can check the Chaos Mesh logs for troubleshooting or directly create a GitHub issue to report this problem to the Chaos Mesh team. Besides, you can forcibly delete the Chaos experiment with the following command:
kubectl annotate networkchaos web-show-network-delay chaos-mesh.chaos-mesh.org/cleanFinalizer=forced
Delete Chaos experiments using Chaos Dashboard
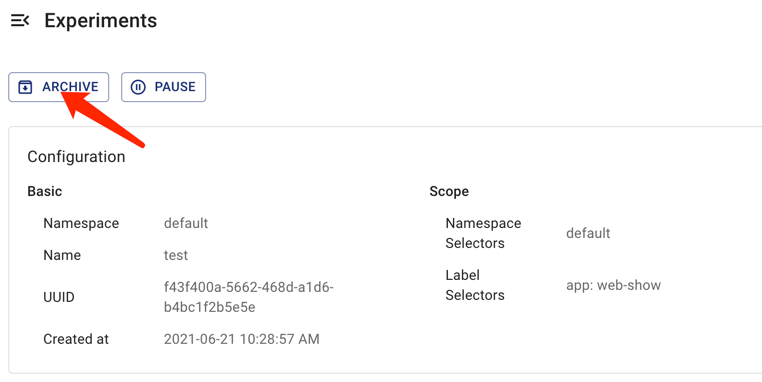
If you want to delete a Chaos experiment on Chaos Dashboard and archive it to the experiment history, you can click the corresponding Archive button of the Chaos experiment.
